Best Render For Garden Walls
If you’re wondering whether you can get an inexpensive and quick way of uplifting the appearance of your garden walls, worry no more.
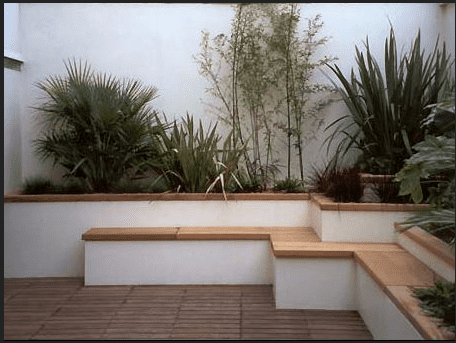
Applying render on garden walls is a perfect way of hiding worn-out brick. That way, your garden walls will get a smooth and new look. Besides, it’ll improve your home’s value.
In this article, we’ll discuss the best render for garden walls and how to apply render on garden walls.
Required Tools
Here’re the tools needed for a successful DIY garden wall rendering project:
- Rendering mortar
- Mixing bucker
- Mixer
- Trowel
- Hawk
- Bristled brush
- Wooden plank
- Sponge
Steps to Follow
Here’re the steps to follow to render your garden walls.
Step 1- Repairing structural issues
The kind of outcome you’ll get from your render finish will mainly depend on the nature of the existing wall. Before applying render on the garden walls, ensure any structural problems such as cracks are fixed.
You might require the assistance of an expert to repair bigger structural issues such as shaky walls or large cracks.
Step 2- Get rid of any wall details
If the wall has any details like pipes, vents, and alarm boxes, you’ll need to detach them from the wall before applying render. Simply reinstall them after completing the rendering project.
Ensure you detach the items from the wall carefully to avoid unnecessary breakages and cracks that can incur extra costs to fix.
If the garden wall is already rendered, you’ll need to clear the older render layer before you apply a new coat of render. Applying new render on worn-out render will turn out unsuccessful as the new render won’t adhere to the old render material.
Step 3- Clear dirt and debris from the wall
It’ll help to apply the render mortar on a grease-free and dust-free wall for a professional and nice-looking render finish. By applying render mortar on clean walls, you’ll avoid several problems like uneven surfaces, hollows, and bumps.
You’ll need a bristled broom to clean the wall. Simply scrub the wall surface with the bristled broom to clear any dirt and debris. Scrub the entire wall surface until it’s completely clean.
Once done, hose down the entire wall surface. Don’t skip this step, especially when dealing with absorbent walls such as those made of sandstone. Hosing the wall will moisten it to prevent the render from drying out quicker than necessary and become challenging to finish.
Step 4- Mix the render
There’re several render systems you can apply to garden walls. However, they differ in terms of how to prepare them. Just make sure you read the instructions that come with the render packaging on how to mix it appropriately. Generally, render comes in the form of a powder. You’ll mix it with water to form a paste.
To mix render, add clean water into a mixing bucket. Next, add the recommended amount of render. Generally, you’ll need to mix 20 kilograms of render with 8 liters of water.
Preferably, use a powered mixer for easier and faster mixing. If you don’t have a mixer, simply rent one from a nearby hardware store. You should mix the mortar until you get the consistency of toothpaste. Also, ensure there’re no lumps in the mixture.
Once you’re done mixing, clean the tools immediately to prevent the mortar mixture from drying up on them.
Step 5- Start applying the render
You’ll need to start applying the render immediately after mixing. Else, it’ll dry out soon and become challenging to work with.
There’re several ways of applying render on a wall. One of the easiest methods is scooping the render with a trowel and putting it on a hawk. Next, position the hawk on the wall surface at an angle of 45 degrees. Then smear the mortar over the wall with the trowel.
You should apply the render from the bottom to the top. Start with a base coat, which should be 5mm thick. Ensure you apply the render evenly over the whole wall surface.
Step 6- Installing a rendering mesh
You’ll need to mount a rendering mesh on the wall. Essentially, the mesh stabilizes the render. Also, it prevents the render from cracking. It’s typically made from fiberglass.
You can purchase the mesh from a nearby hardware store. Ensure you purchase a mesh that will fit the entire wall by taking the measurements of the width and the length of the wall.
Also, buy a high-quality mesh for the best results. A poor-quality mesh won’t stabilize the render. When choosing a mesh, consider a type with a pressed weave for maximum stability.
Also, consider a mesh with a special coating that resists alkaline elements. Such a coating prevents the mesh from breaking down. If it breaks down, the render will be left bare.
Upon cutting the mesh, install it carefully into the newly applied render. Ensure you install it when the render is still wet. Push the mesh into the render with a trowel starting from the center up, then center down. That way, you’ll prevent it from wrinkling during installation.
Ensure the pieces of the mesh you’ve cut don’t have any spacing between them. You should install them in a way that they lap over each other at a distance of 100mm between the pieces to allow for continuity.
You can level the mesh and the render surface with a wood plank. Move the plank starting from the bottom to the top. Continue moving the plank until the surface is level.
Step 7- Start applying the second coat of render
Before applying the second coat of render, allow the base coat to dry and the stabilizer mesh to stick in place for approximately 30 minutes. Once done, start applying the second coat of render as you did with the base coat.
The second coat should have a thickness of 10mm at most. If the render mixture is thicker than needed, it might fail to dry evenly. Consequently, it may crumble after application.
Allow the second coating to dry for about 30 minutes. Use a clean wood plank to even out the render surface. Move the plank from the bottom to the top for the best results.
Step 8- Cover any hollows with render
Once you’ve leveled the render, you may notice some hollows over the surface. The parts that may not be completely firm or hollow tend to look lighter or wet than the properly filled surface.
You’ll need to cover the hollows by running a clean wood plank along the wall surface. Focus on the wet-looking or raised parts of the wall. You may need to moisten the wall in case it’s relatively dry.
Step 9- Give the rendered wall a finish
You can now give the rendered wall surface a nice, smooth finish by sponging it. Before doing that, allow the wall several days to dry up and stiffen completely.
Once dry, wet a sponge in cool water. Squeeze out excess water from the sponge until it’s just damp. Next, wipe the wall surface with the sponge for a nice, smooth finish.
Rinse the damp sponge severally while wiping the wall. Sponging the wall with a clean and damp sponge will avoid scratching it. Continue sponging until the rendered surface is smooth.
Extra Tips
Here’re some extra tips that can assist you in getting the best render for garden walls:
-
Buy the right rendering material
There’re several rendering materials to choose from, with the most common options being silicone, monocouche, mineral, lime, and acrylic. Each type of render has unique properties. Some are more porous, easier to work with and maintain, and algae resistant than others. Also, their pricing varies, with mineral render being the least expensive option and silicone render being more expensive than the rest.
When choosing the best rendering system for your garden walls, remember to consider your expertise level and budget. Also, consider properties such as texture, colour, and waterproofing.
Generally, lime render is a great choice for rendering garden walls. Besides being attractive, it’s breathable and prevents mold and other problems associated with moisture. However, lime render requires more expertise to work with than other renders. A better option would be a polymer-based lime render as it’s easier to mix and apply.
-
Consider the surroundings
Before applying render or adding any garden wall decorations, consider whether your choice will blend with the existing elements in your property. For instance, before you apply a textured or coloured render on the garden walls, it’ll help to consider whether it’ll complement your home.
Remember that any beautifications that look awkward will affect the value and appeal of your home. If you’re confused about the best way forward, consult a local estate agent or a landscaping design specialist about how your rendering project may affect your home’s value and the best changes that can assist in improving it.
Final Words
Rendering garden walls is a project that requires handy DIY skills. As long as you have the right render materials, tools, and sufficient time, you’ll find it easy to successfully render your garden walls.
Just ensure you prepare for the rendering project properly for the best results. Start with cleaning the wall, mixing the render mortar appropriately, and using the recommended render application techniques.